
Soccer training for kids should feel fun and simple, not stressful. The right soccer drills help children build confidence, balance, and fitness while keeping sessions playful. With steady practice, kids improve their first touch, learn to pass and move, and start making better decisions in games.
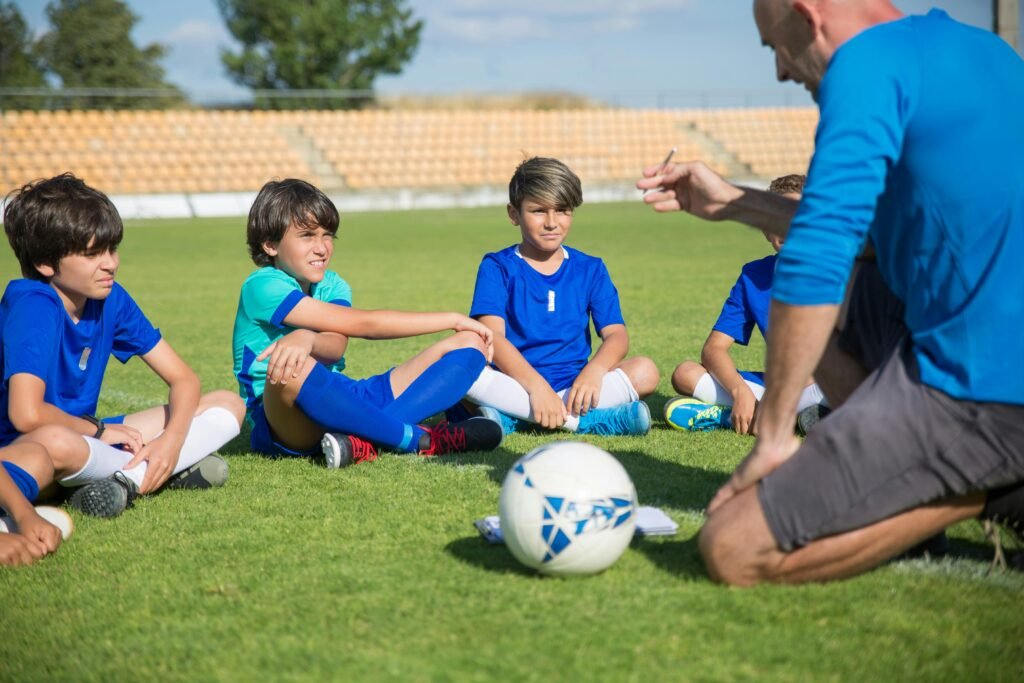
If you are in Toronto, 416 Soccer Club offers age-specific sessions that match your child’s stage of development. Coaches focus on strong basics, lots of ball contact, and a safe, positive environment so each young player can improve at a pace that feels right.
Why Soccer Drills Are Essential for Kids’ Growth
Soccer drills are the building blocks of good play. When kids repeat simple movements often, they build habits that stay with them for years and feel more comfortable with the ball at their feet.
Key Benefits for Youth Player Development
Good kids’ soccer drills support four main areas:
- Soccer skills: Better first touch, closer control, and smoother movement.
- Motor skills and coordination: Quicker feet, stronger posture, and better balance.
- Soccer IQ: Awareness, spacing, and faster decisions under pressure.
- Teamwork: Learning to share the ball, support others, and communicate on the field.
Actionable takeaway for parents:
Keep practice short and regular. Two or three sessions a week, 30–45 minutes each, is usually enough. Aim for many touches on the ball and very little standing around.
Top Soccer Drills for Kids: Core Skills at Every Age
These soccer drills for kids are easy to set up and work well in a backyard, park, or club session. Each one builds a clear skill while keeping things simple and fun.
Dribbling Drills for Kids
Dribbling is often the first thing kids enjoy in soccer. It helps them feel in control, move away from pressure, and gain confidence with the ball.
Drill 1: 4 Corners
In 4 Corners, you mark out a 10 × 10 m square with cones. Each child has a ball and dribbles from one corner to another, turning at each cone. This drill builds close control and helps kids practice turning with the ball while staying aware of their surroundings. It works well for ages 4 to 12, simply by changing the size of the square and the pace.
Key points to focus on:
- Encourage small touches and using both feet.
- Remind kids to lift their head before they turn so they see what is ahead.
- Make it easier by using a bigger area and walking the turns.
- Make it harder by adding a gentle time target or a passive defender.
Drill 2: Cone Weaving
Cone Weaving is a simple slalom through 6–10 cones set about 1–1.5 m apart. Players dribble in and out of the cones, then turn and come back. This drill builds rhythm, balance, and better foot contact with the ball.
You can:
- Ask for soft, quick touches while staying light on their toes.
- Add a short sprint or burst of speed after the last cone for an extra challenge.
- Use it as a light fitness drill because it naturally improves agility and coordination.
Drill 3: Dribbling Under Pressure
For older kids (around 7–12), Dribbling Under Pressure prepares them for real defenders. Set up a 10 × 15 m lane and pair players: one attacker with a ball, one defender. The attacker tries to reach the end line while the defender applies gentle pressure.
Coaching focus:
- Show how to shield the ball with the body and change speed to escape.
- Introduce a simple feint or fake to get past the defender.
- Make it tougher by narrowing the lane or adding a time limit, always keeping contact age-appropriate.
Actionable takeaway:
Praise brave dribbling and smart decisions, not just beating the defender. Ask for eyes up and soft touches, even when they lose the ball.
Passing & Receiving Drills for Kids
Passing and first touch turn a group of kids into a real team. When children can control and share the ball, they stay more involved and enjoy the game more.
Drill 1: Triangle Passing
Triangle Passing uses three cones in a triangle, 5–8 m apart. Three players pass the ball around and follow their pass to the next cone. It teaches passing accuracy, movement off the ball, and receiving on the move.
While they play, guide them to:
- Take their first touch slightly out of their feet so the next pass is easier.
- Keep their body open to the field, not facing only the cone.
- Call for the ball early so teammates know where to pass.
Once they are comfortable, you can progress to one-touch passing or even add a second ball for extra speed.
Drill 2: Wall Passes at Home
Wall Passes are perfect for home practice. A child passes to a safe wall or rebounder, controls the return, and passes again. It is simple but very effective for building repetition.
You can make it more useful by:
- Asking for firm, accurate passes to a small target on the wall.
- Switching between right and left foot every few minutes.
- Trying short one-touch phases or “weak foot only” rounds.
Drill 3: One-Touch Passing Square
In a One-Touch Passing Square, four to six players stand around a 10 × 10 m square and keep the ball moving quickly. The goal is to pass, move, and support each other, ideally with one touch when possible.
Key ideas:
- Ask players to check towards the ball before it arrives.
- Encourage early support so there is always a passing option.
- Keep them talking: “here,” “turn,” “back,” and simple cues work well.
This drill naturally raises the speed of play and builds light fitness at the same time.
Actionable takeaway:
Teach a forward first touch when there is space. It creates time, opens passing lanes, and makes the game feel easier for kids.
Defensive Drills for Kids
Good defending is calm, not wild. Kids need to learn how to close space, guide opponents, and win the ball at the right moment.
Drill 1: Press and Contain
Press and Contain is a 1v1 exercise in a 10 × 10 m grid. The defender closes down the attacker, then slows near them and guides play to one side instead of diving in.
The main coaching points are simple:
- Stay low and side-on, ready to react.
- Close down quickly, then slow to control.
- Tackle only when the timing is right.
Later you can turn this into 2v2 so a second defender learns to cover.
Drill 2: Positioning Gates
Here you set up two small cone gates, 2 m wide and 5–7 m apart. The attacker tries to dribble through either gate, and the defender positions themselves to block and delay.
Focus on:
- Showing the attacker to one side instead of standing square.
- Staying balanced and watching the ball, not just the player’s legs.
This drill is good for teaching angle of approach and patience.
H4: Drill 3: Closing Speed
In Closing Speed, the defender starts 8–10 m away from an attacker. On a signal, they sprint to close the gap, then slow down and contain. It builds the habit of closing fast and then staying in control.
Remind kids to:
- Burst quickly at the start.
- Slow down before reaching the attacker.
- Stay ready to adjust rather than lunging in.
Actionable takeaway:
Use the simple order delay, deny, then dispossess. Kids learn that slowing the attacker is often the first job, not winning the ball straight away.
H3: Goalkeeping Drills for Kids
Young goalkeepers need safe basics before anything else. Start with catching, footwork, and simple positioning instead of powerful shots.
Drill 1: Safe Catching
Safe Catching is a calm exercise with one server and one keeper about 6–8 m apart. The server sends chest-height and low balls, and the keeper steps forward to catch them.
Key reminders:
- Keep eyes on the ball all the way in.
- Use a soft “W” hand shape when catching.
- Step into the ball rather than leaning back.
Drill 2: Beginner Diving
Beginner Diving should be done on a soft surface. The ball starts just out of reach to one side. From a squat or kneel, the keeper reaches, tips or gathers the ball, and learns to land safely on their side.
You can progress by adding slow rolling balls, always keeping the focus on safe technique and relaxed landings.
Drill 3: Angles and Position
For Angles and Position, set up a mini goal and have a server move across the front of the area. The keeper adjusts their position each time so they stay central to the ball.
Ask them to:
- Set their feet before each shot.
- Use small adjustment steps.
- Stay balanced with weight slightly forward.
Actionable takeaway:
For young keepers, limit hard shots. Confidence and safe movement come first, power comes later.
Age-Specific Soccer Training: Matching Drills to Development
Good training respects age, size, and experience. Young kids need simple games and lots of movement. As they grow, you can add more pressure and decisions.
Ages 4–6: Building Confidence with Basic Skills
At this stage the priority is comfort with the ball and enjoyment.
- Skills focus: Simple dribbling, basic ball control, gentle passing.
- Training approach: Fun games like Red Light Green Light and Follow the Leader, with everyone moving most of the time.
- Why it works: Kids start to love the ball while quietly building balance and coordination.
Sessions can be about 30 minutes with short stations and quick turns. Avoid long lines and complicated rules.
Ages 7–9: Developing Technique and Early Game Awareness
Now kids can handle a bit more structure.
- Skills focus: Tighter dribbling, first touch under light pressure, short passing combinations.
- Training approach: More game-like play with 3v3 and 4v4, plus simple technical drills.
- Why it works: Players begin to notice space, support, and the idea of “playing together.”
Sessions of 45–60 minutes work well. Give quick feedback, but don’t over-coach every moment of a scrimmage.
Ages 10–12: Refining Skills and Building Game Intelligence
At this age, players can manage more intensity and decisions.
- Skills focus: Passing accuracy, receiving across the body, basic defensive shape, simple tactics.
- Training approach: Faster technical work and decision games, including numbers-up and numbers-down situations.
- Why it works: Players start to read the game, not just follow the ball.
Sessions of 60–75 minutes with clear goals and simple tracking (like passes completed or shots on target) make sense. Avoid locking kids into one position too early.
Actionable takeaway:
If a drill feels wrong, change the space or speed, not the child. Smaller space or time goals for advanced players, more space and slower pace for beginners.
Physical Fitness for Soccer: Supporting Your Child’s Skills
Fitness supports everything else. Kids need stamina, agility, strength, and flexibility, but all at a level that fits their age.
Stamina and Endurance Drills for Kids
Short running intervals, sprints, and chase games help build stamina without feeling like punishment. These drills help kids play at a steady level throughout a match instead of fading early. You can keep things simple with relay races, tag, and ball-based runs rather than long, slow laps.
Agility and Coordination for Young Players
Ladder steps, cone changes, and quick turns build faster reactions and better control. Start with basic patterns and then add the ball once your child is comfortable. Adjust difficulty by changing speed or direction, not by making drills too long.
Choosing the Right Soccer Program for Your Child
A good Toronto youth soccer program should match your child’s age, personality, and goals. The best programs balance fun, learning, and safety.
What to Look For
When you compare clubs, look for:
- Clear age groups (4–6, 7–9, 10–12).
- Small coach-to-player ratios.
- Licensed or experienced youth coaches.
- Practices with lots of touches and small-sided games.
- A plan that covers technical, tactical, and physical growth.
- A positive culture that builds confidence and respect.
- Simple communication and useful at-home tips.
- Indoor options for winter and safe, good-quality fields or turf.
- Proper warm-ups and clear contact rules for each age.
- Clear fees and what is included.
How 416 Soccer Club Helps Kids in Toronto
416 Soccer Club is built around helping young players grow step by step, not rushing them.
- Age-specific pathways: From early learners to pre-teens.
- Expert coaching: Strong technique first, then smarter decisions and game understanding.
- Growth culture: Confidence, creativity, and teamwork are built into every session.
- Parent support: Take-home drills, updates, and regular check-ins about progress.
Actionable takeaway:
Ask for a trial session. Watch how the coach speaks to kids, how often each child touches the ball, and how engaged they look from start to finish.
At-Home Practice Plan (15–25 Minutes, 3 Times per Week)
You don’t need much space to keep your child improving between sessions. A small yard, driveway, or quiet park area is enough.
- Warm-up (3 minutes): Ball taps, toe touches, figure-8 dribbles, and light skips for about 30 seconds each.
- Technical block (10–12 minutes):
- Wall passes: 2 minutes right foot, 2 minutes left foot.
- Cone weave: 2 minutes with both feet.
- Turns at a cone (inside, outside, sole roll): 2 minutes.
- Juggling attempts: 2 minutes, tracking their best streak.
- Game finisher (3–5 minutes): Pick a target and complete 10 clean passes or 10 guided dribbles with a speed change.
- Cool-down (2–3 minutes): Easy dribble walk and light stretches for calves, quads, and hamstrings.
Actionable takeaway:
Use a simple progress chart on the fridge. Track juggling streaks, fastest cone time, or most accurate passes. Seeing progress motivates kids to keep practicing.
Frequently Asked Questions for Parents
Two or three focused soccer sessions each week are usually enough. Adjust session length to age, roughly 30–60 minutes.
With steady practice and a good program, many kids improve in 4–6 weeks. Look for a better first touch, more confidence, and smarter choices in games.
Start with simple soccer drills for kids like cone weaving, Red Light Green Light, and Triangle Passing. Keep it fun and praise effort.
Not before age 12. Letting kids try different roles creates more complete, confident players and helps avoid burnout.